Building a ship in minecraft can be one of the most difficult things to build. Their rounded shapes are very difficult to recreate with large blocks, without making it look weird.
I’m by no means a ship building expert and I don’t claim this guide is the best way to build a ship, but hopefully it’ll help people, especially beginners, design and create their own ships.
Just a note, the difference between a ship and a boat is that a boat is smaller. You could say a boat fits into a ship. Though the difference doesn’t really matter, as most people use both terms for the same thing anyway.
Planning
Build a ship is best done by planning your design first. Think of a general shape and size of the ship you want and try to find some reference pictures to work from, whether it’s a minecraft version or a photograph of a real ship.
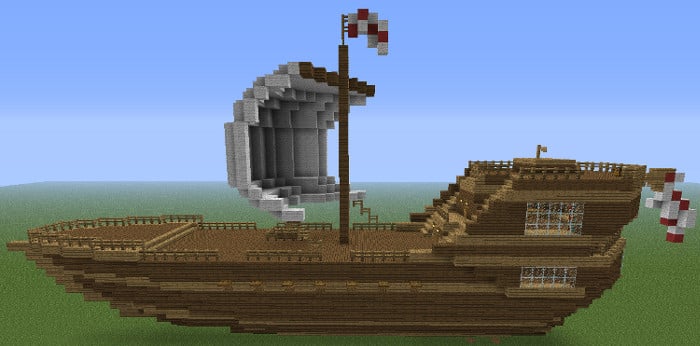
When building a ship, you can often divide the parts you want to build into 4 separate sections. The bow (front), stern (back), the remainder of the hull (body of the ship) and all the other details, like masts, flags, etc.
The front and back of the ship are often the most difficult parts to build, as they’re round and generally odd looking when translated into minecraft builds.
I usually either start with the front or with the middle, though building the entire framework first will also work. This tutorial will cover each step individually, so you can do them in any order you like. However, the first thing you always have to do is determine the size of your ship, as it’ll determine how wide the bottom will be, which will always be the place we start at.
Bow (front)
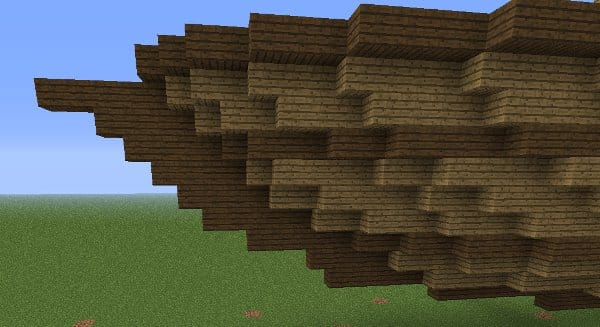
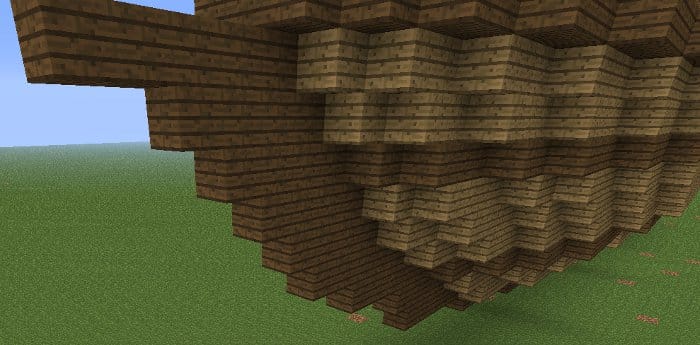
The front of the ship is a bit tricky, as it’s both round and pointy. It’s often best to first create the general shape and then take out blocks to make it look more aqua dynamic and overall better looking. Start out by first finding or creating the middle of your ship. This will be the lowest point and will be used as reference points from which we build up the remainder of the front.
Start by creating a long row of blocks as the middle of the ship. Then slowly build your way up to your desired height. Start to increase the height very slowly, only about 1 block every 3-5 blocks. Slowly increase this until you’re about half way up. Now increase the height faster, about 1 block every 1 or 2 blocks until you’ve reached your desired height.
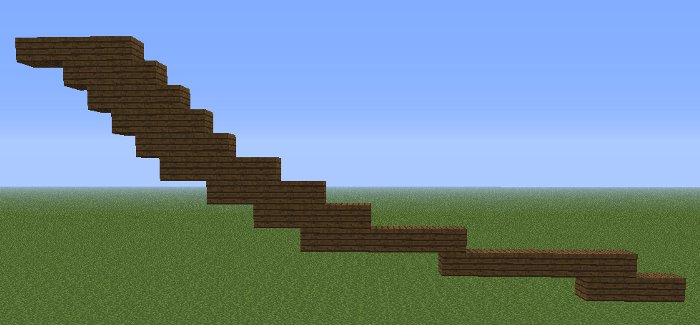
Once you’ve reached the desired height, it’s time to start building from this point towards the sides. Begin on 1 side and slowly work your way towards the desired width of the boat, but make sure you don’t make it too wide or not wide enough. You generally want to work your way to about 8-11 blocks away from the middle line of your ship, though again, it depends on the size and type of ship you’re building.
Start out by increasing the width by about a block every 2 blocks you place. Then increase the width every 3 blocks you place. Keep making the intervals at which you increase the width longer and longer untill you’ve reached the desired width. Now copy this on the other side. If you’re having difficulties to recreate it, either fly over your ship and try to mirror the image, or take a screenshot and mirror it with an image editor.
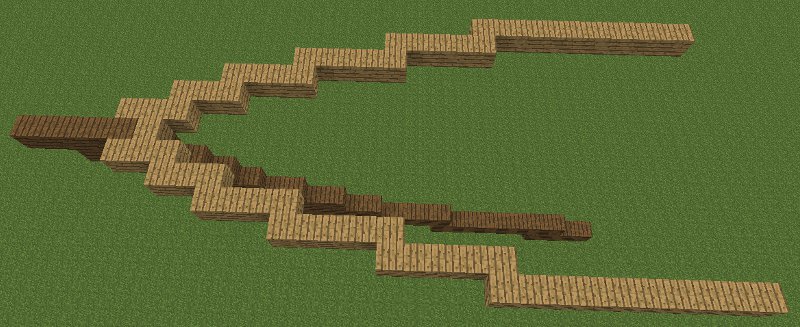
It’s very difficult to explain the exact steps you need to take to make the front look good from this point, as it’s generally just a matter of experimenting and it also depends a lot on the type of ship you’re building. Try to make the front look sharper by removing and adding blocks, play around with it until it looks good. Note that if the front is made entirely out of the same color wood (or same block), it will rarely look good enough on it’s own, so make a few layers out of a different color or a different block. It’ll look better right away.
If you’re really having trouble, try copying an existing minecraft boat to get a feel of it. Count the number of blocks they’ve placed on each layer and then change it to your own liking.
Stern (back)
I find the stern a little easier to start, but it’s often a little tricky to get it to look right, especially if you make it higher to create a captain’s cabbin.
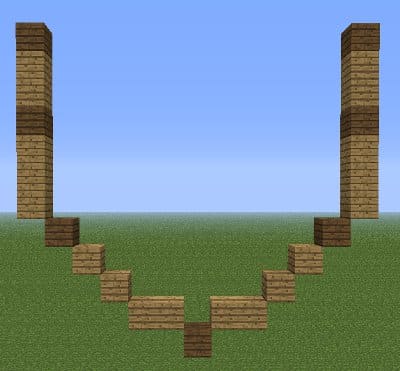
I always start by creating an anchor-like shape the edge of the middle, at the height of the deck. This is often a great way to start, though higher ships might require you to start this lower.
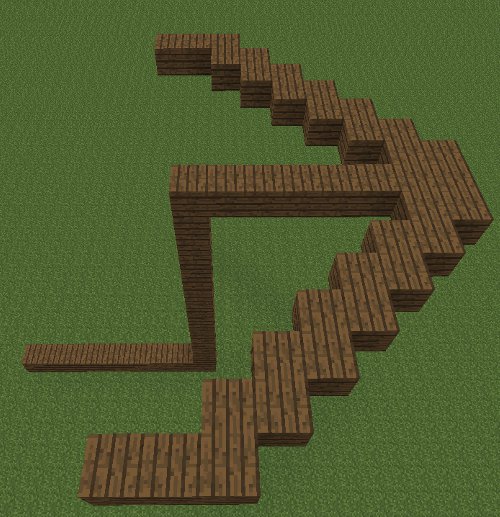
After this, I first connect the bottom of the ship to the edge of the anchor-like shape by simply placing blocks and making the length 1 block smaller every time I go down 1 block. Note that we need to leave some space for a room, like the captain’s cabin, so I’ve already placed some glass blocks to mark this space.
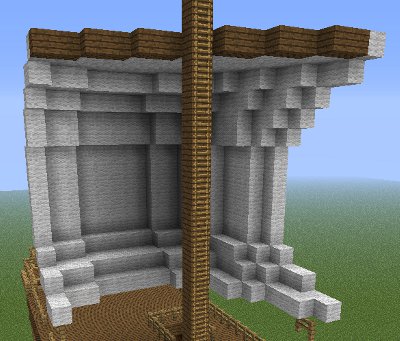
Once you’ve finished this, the general shape looks decent, but often quite odd. I then begin to trim the overall shape down, by removing and adding blocks to make it look longer and more aqua dynamic. I also add windows on the upper part, which will usually be a bedroom or office of the captain.
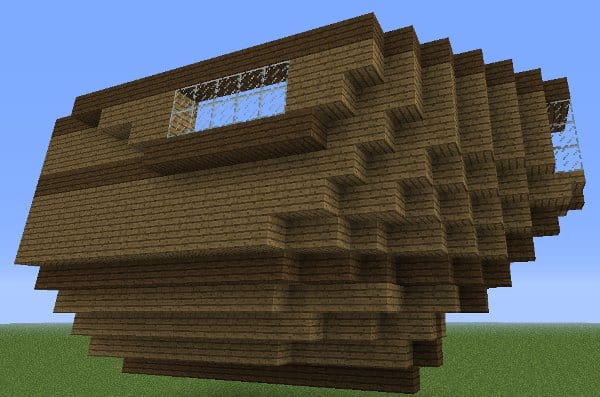
Once I’ve finished this it’s time to build upwards. I tend to simply add layers to the top layer, without increasing or decreasing the width, this will look quite good, but improvements can be made. After I’ve added enough layers for a second floor, I begin trimming it all down again. I tend to remove some corners and replace them with fences, this makes it all look less flat and plain, without losing the overall shape.
The top part can also stick out a little on all sides, which will also help to make it look less flat and plain. This is something I usually do after I’ve built up the layers, simply by adding another layer against the sides.
This is also usually the part where I add the windows to both the captain’s cabin and other rooms in the back, as windows can look quite odd, so they often need some extra attention.
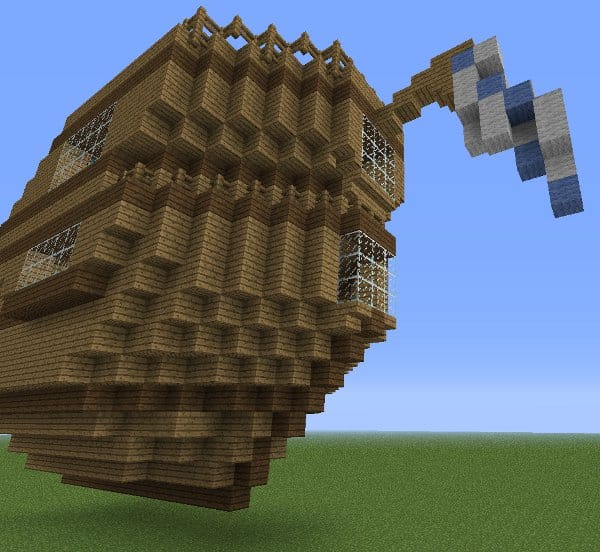
I often also add the rudder and possibly a pole with a flag, as I might forget to add them later (like I did in the picture).
Hull (body)
The hull is fairly easy, especially if you’ve already created either the stern or bow. You simply extend the blocks at the edges of those parts until you’ve reached the desired length.
However, if you’re starting with the hull, building it will still be quite easy. You start by creating the middle, which is just a long line of blocks.
Then determine how wide you want your ship to be and slowly work your way towards that height and width. Don’t increase the height too fast, or it’ll look very weird. It may take some practice and experimenting to get the right size, so don’t create the whole hull right away, instead, create a smaller 5 block long part and check if that part looks good, if it doesn’t, alter it and check again.
Details
Once you’ve completed the entire body of the ship it’s time to add details. This will once again depends on the type of ship you’re making, a pirate ship will usually have sails, while a steam punk style ship might have a hot air balloon with huge propellers.
One detail that will look good on pretty much all ships is a few layers in a different block. A ship made entirely out of wooden planks looks quite plain, so replace a few layers with logs or differently colored planks.
You may also want to add fences on the edges, both to prevent people from falling off and as a way to make them ship look better. Don’t forget to leave some openings to allow people to go on and off board.
Sails
Sails are quite difficult to make, so I often create the in their folded positions, as if the ship is laying at anchor. This will work best when the ship is in a harbor, where it’s a lot more realistic for a ship to have its sails folded.
However, if you do want to hoist the sails, creating a diagonal spreader, which are the branches on a mast, often look better, as they allow you to create better looking sails. Straight spreaders can also be used, but the sails will often look a bit odd and square, especially on smaller ships.

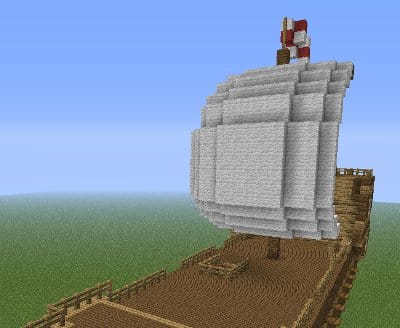
Creating a sail requires some practice and trial and error, it can take a while to make it looks good and you often have to adjust the width and length of the mast and spreaders. However, you generally create circular shapes, which start and end at spreaders, though they could also be attached to ropes on deck, which could be mimicked with fence posts.
A trick I use to create sails is to open paint and first draw the spreader, make sure each block you’ve used on your boat’s spreader is resembled by 1 pixel.
After this, I use the circle tool to create a circular shape from 1 side of the spreader to the other. This often gives me a great horizontal outline of the sails I want. I then do the same by drawing the mast, but again, remember the 1 pixel to 1 block ratio. After the mast is drawn I use the circle tool again to create another circular shape that marks the outline of the sail vertically. Once both shapes have been drawn, I only have to recreate it on my minecraft boat, though it often requires some more tweaking.
I usually find a few pictures of real-life examples and try to copy those as close as possible. I then make any needed alterations to make it look better with the overall design of the ship.
If you’re really struggling, try downloading some existing minecraft ships and take a closer look at the way those people have built that ship.