Are you wondering how to curve rails In Minecraft? Let’s find out!
For newbies, making your way out of the harsh surroundings of Minecraft is rather difficult. You constantly wish you had discovered some strategies earlier in the game when it comes to pulling off complex stunts like curving the rails.
How To Curve Rails In Minecraft?
In order to curve rails in Minecraft, you need to place your tracks in parallel. Once you reach the point of curvature, simply aim between the two lanes and click on them to place the rail block in between. This will automatically cause the rails to curve regardless of the terrain.
Needless to say, there are certain Minecraft blocks that can mess up your rail placement. Consequently, procuring the correct equipment can be a pain – especially as a beginner.
In this tutorial, we will go over the method for curving rails in Minecraft along with its exact placement requirements, so let’s get started!
Step #1: Mining And Positioning
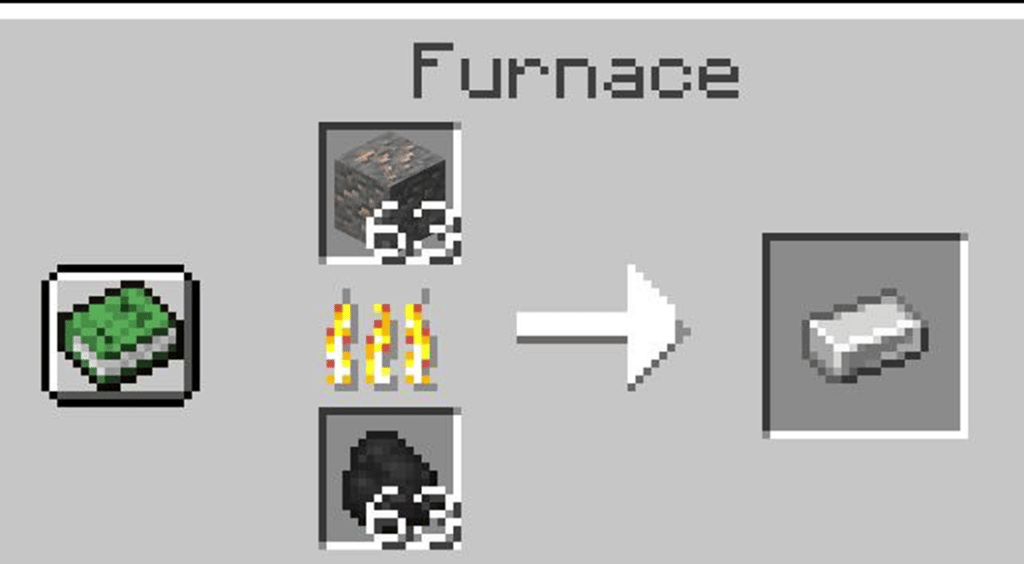
Develop rails for mining carts—mine and smelt six blocks of iron ore in an oven. In your inventory, add the iron billings you have collected. Ax down a tree and turn the timber into sticks.
Place one stick in the center box and three iron bills vertically on the left and right sides of the crafting menu by clicking on a crafting bench. Six segments of mine cart track will be produced as a result.
Place the mining cart tracks in your inventory by clicking on them. In a straight path, connect the two mining cart tracks. When two parallel tracks are placed next to one other, they will automatically adjust themselves such that they are tip to tip.
Step #2: Creating The Path
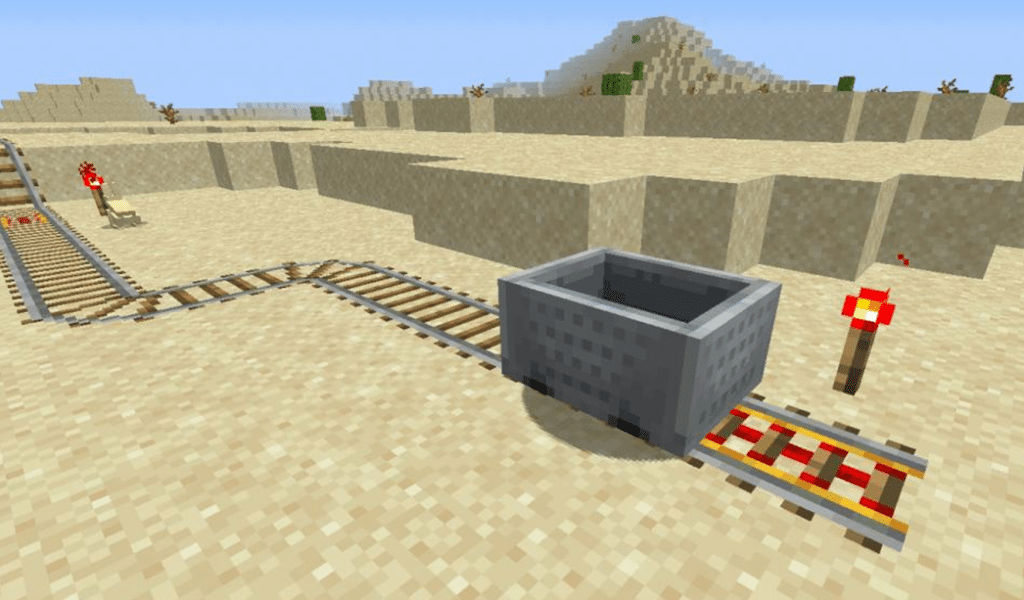
Place another piece directly next to one of the two pieces of track you’ve previously set down. An “L”-shaped curve will be produced as a result.
No matter how the track is laid out, it will remain curve in this “L” form even if the track section is parallel or perpendicular to it. Next to the other piece of track you installed, put down a part of the track. It will result in the formation of an enclosed circle.
Extend the initial line of track to prevent a circle from forming. The game will generally assume that you wish to automatically construct a ring if you don’t extend the initial line of the way.
Step #3: Rail Detector
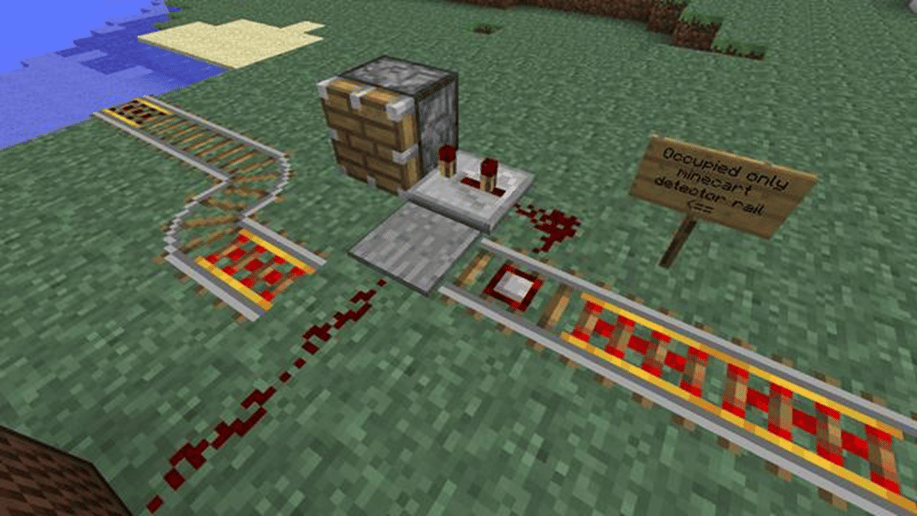
The top of a building under the target space can be used as a detector rail’s attachment point if an effort is made to attach it to a block’s side or bottom.
A detector rail is intended to be attached to the side of a fence on the ground. It is generally attached to the upper of the land adjacent to the wall.
Testing
It is time to put the track to the test. To make a mining cart, arrange iron billings in a “U” configuration on a crafting bench. The mine cart should be added to your inventory.
Place the mine cart on the track after approaching it on foot. To move the mining cart along the way more quickly, get inside it. As soon as the trial ends, the mine cart will stop.
Conclusion
Overall, there are several aspects and resources to keep an eye out for curving rails on Minecraft. Whatever keys you choose to go forward and backward with, you may use to steer the mine cart.
Although progress may be laborious, you can ride up slanted rails. However, those resources are often used to build fences regarding the requirement and needs for creating a path. These tools ought to curve rails in Minecraft easier for you in the early game.
Looking for more Minecraft content? Check out our other guides:
- Best Minecraft 1.19 Seeds
- Best 1.17 Texture Packs In Minecraft
- Best Resource Packs For FPS in Minecraft
- Best Axe Enchantments Minecraft
- Best Food in Minecraft
Not got Minecraft yet? Buy it from Minecraft.net!