Here’s the ultimate Minecraft potion brewing guide! After reading this page, you’ll understand everything there is about potions in the game.
Minecraft features tons of content that will keep the game fresh and exciting for all players. Since there is a plethora of content, players can do anything they like or prefer. If you are a fan of alchemy, then look no further because this is the ultimate Minecraft potion brewing guide. After reading this guide, you’ll understand everything there is about potions and how you can start brewing them right now.
To start brewing a potion, you will need the following equipment:
- A Brewing Stand
- Blaze Powder
- Glass Bottles
- A water source
Those are only the main things that you’ll need to brew potions. If you want any specific potions such as a potion of invisibility, you will have to gather the required materials. Worry not because we will explain all of that in the section below.
How to Make a Brewing Stand in Minecraft
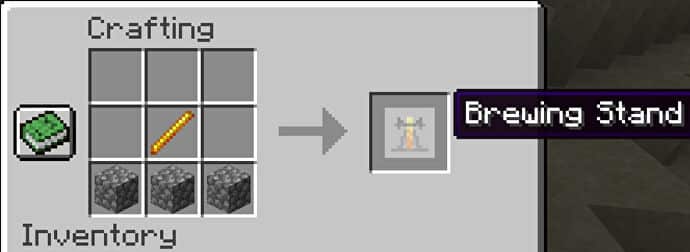
First things first, you must craft a Brewing Stand so that you can start brewing your potions. This item is a must-have and you cannot create potions without it. To make this stand, you must have 3 cobblestones and a Blaze Rod. Once you have these items, open the crafting menu and put the 3 cobblestones in the bottom row, and put the Blaze Rod in the center. This will give you the Brewing Stand.
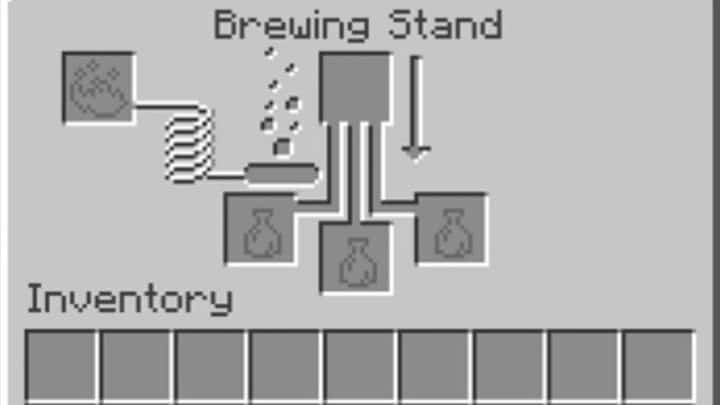
Now, place the stand wherever you like and press the right-click to open the brewing menu. It can seem quite overwhelming at first but here is a quick breakdown of what you can expect:
- The slot on the left is where you add Blaze Powder. This is your fuel just like putting Coal in a Furnace.
- The three slots at the bottom are where you place the bottles of potions.
- Finally, the slot on the top is where you place an ingredient.
Each potion takes about 20 seconds to brew but you can make multiple potions due to the additional slots at the bottom. However, keep in mind that you will need to have enough Blaze Powder or you won’t be able to use the stand anymore.
Minecraft Brewing Chart
Here’s a list of all Minecraft brewing stand recipes.
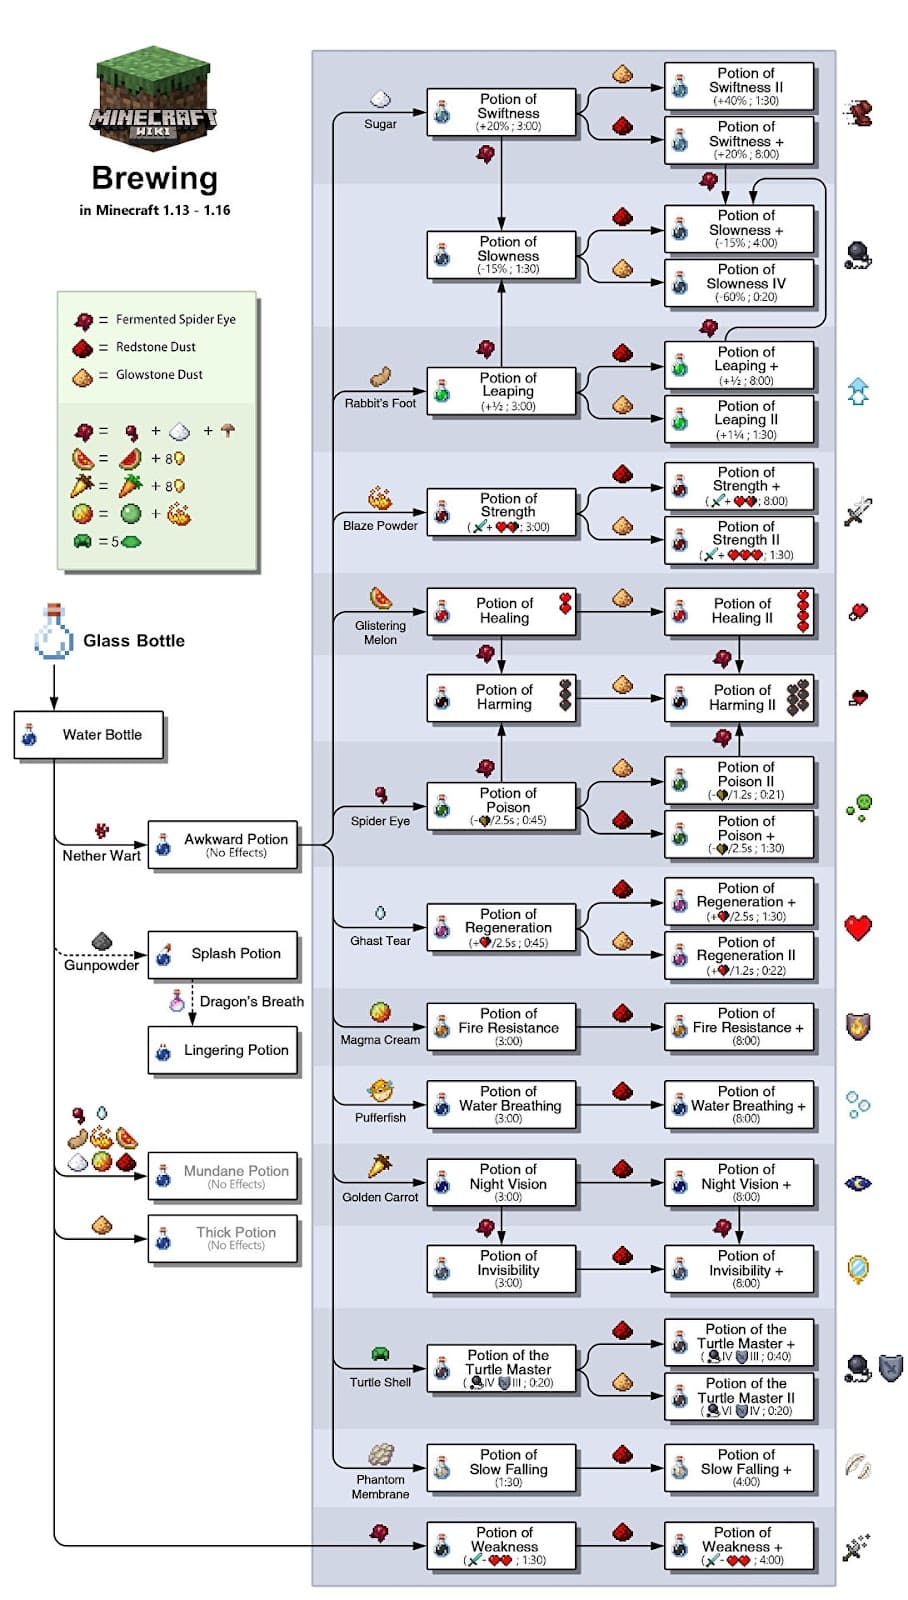
If you want to know all the potion recipes, don’t worry because we’ve got you covered. If you want to brew a specific potion, here are all the recipes that you can brew:
- Awkward Potion: Water Bottle + Nether Wart
- Potion of Healing: Awkward Potion + Glistering Melon
- Potion of Poison: Awkward Potion + Spider Eye
- Potion of Harming: Potion of Healing/Poison + Fermented Spider Eye
- Potion of Regeneration: Awkward Potion + Ghast Tear
- Potion of Strength: Awkward Potion + Blaze Powder
- Potion of Swiftness: Awkward Potion + Sugar
- Potion of Leaping: Awkward Potion + Rabbit’s Foot
- Potion of Slowness: Potion of Swiftness/Leaping + Fermented Spider Eye
- Potion of Night Vision: Awkward Potion + Golden Carrot
- Potion of Invisibility: Potion of Night Vision + Fermented Spider Eye
- Potion of Fire Resistance: Awkward Potion + Magma Cream
- Potion of Water Breathing: Awkward Potion + Pufferfish
- Potion of the Turtle Master: Awkward Potion + Turtle Shell
- Potion of Slow Falling: Awkward Potion + Phantom Membrane
- Potion of Weakness: Water Bottle + Fermented Spider Eye
Minecraft Brewing: What Does Each Ingredient Do?
Now that you are familiar with how to brew each potion, let’s find out what each ingredient does so that you can be aware of what you are adding to your potions. Plus, you can brew your own potions by adding whatever material you like. However, to do that, you must know what each ingredient does and why you can use it to brew your ideal potion. There are three types of ingredients that you can add to your potions – Base, Secondary, and Elemental.
Minecraft Brewing: Base Ingredients
When you want to brew a potion, you’ll always start with the base ingredients. So, no matter what, you will use one of the following in your potions before moving on to the next ingredients.
- Dragon’s Breath creates a Lingering Water Bottle
- Fermented Spider Eye creates a Potion of Weakness
- Glowstone creates a Thick potion
- Gunpowder creates a Splash Water Bottle
- Nether Wart creates an Awkward potion
- Redstone Dust creates a Mundane potion
Minecraft Brewing: Secondary Ingredients
Once you have added the base ingredients, you can add the secondary one to give an effect to your potion. Depending on what you use, you’ll have various effects inside your potion.
- Blaze Powder adds Strength
- Fermented Spider Eye adds Poison
- Ghast Tear adds Regeneration
- Glistering Melon adds Healing
- Golden Carrot adds Night Vision
- Magma Cream adds Fire Resistance
- Phantom Membranes adds Slow falling
- Pufferfish adds Water breathing
- Rabbit’s Foot adds Swiftness
- Sugar also adds Swiftness
- Turtle Shell adds Water breathing
Minecraft Brewing: Elemental Ingredients
Furthermore, you can even add elemental ingredients to your potions to make them even stronger. However, keep in mind that these ingredients are only available in the Education and Bedrock editions of the game.
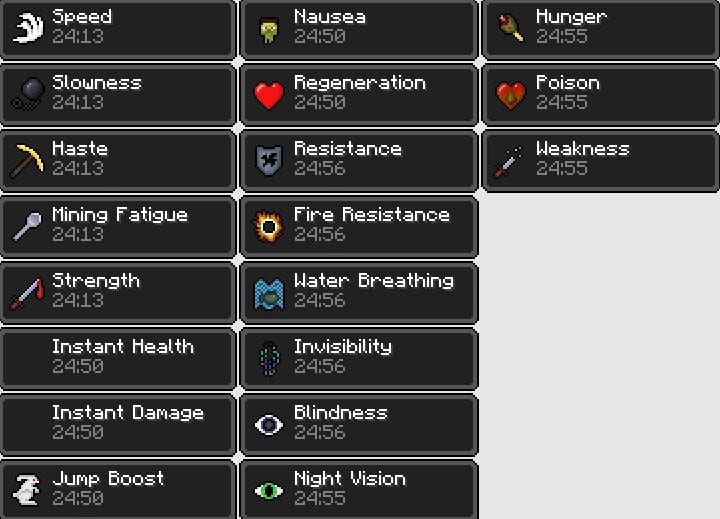
- Bismuth cures nausea
- Calcium will treat blindness
- Cobalt cures weakness
- Silver reduces the effects of poison
Minecraft Brewing: Potion Modifier Ingredients
Once you have brewed your initial potion, you can add various modifiers to boost or enhance the effects of your potion. Depending on what you use, you’ll get varying results. Here are all the modifiers that you can use:
- Glowstone Dust increases the effect of the potion.
- Redstone Dust extends how long the effect lasts.
- Fermented Spider Eye can turn your potion into something different.
- Gunpowder turns a potion into a Splash Potion.
- Dragon’s Breath being added to a Splash Potion transforms it into a Lingering Potion.
Minecraft Brewing: Best Potions in Minecraft
Now that you’ve seen how to make all the potions and what each ingredient does, let’s talk about some of the best potions in Minecraft. Keep in mind that everyone will have a different answer when asked about the best potion but these three are generally considered the best.
Potion of Healing
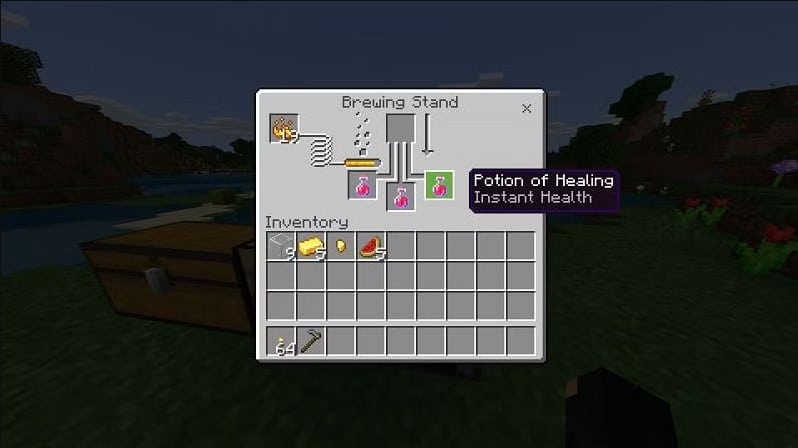
This is one of the best potions due to its effects. You can drink it to quickly restore your health and keep on regenerating for a few seconds. To brew it, you need to use the Nether Wart and Glistering Melon. Not only is this an easy potion to brew but it also provides one of the best effects in the game.
Potion of Night Vision
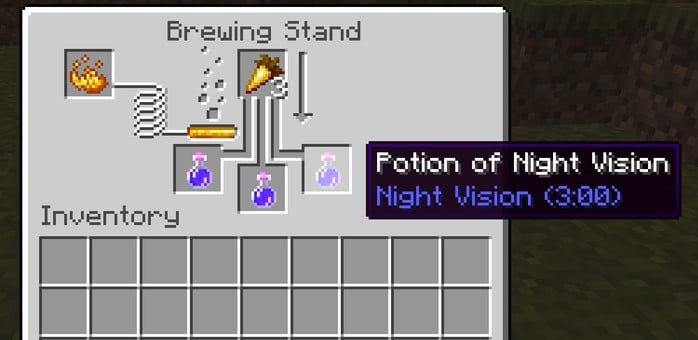
As the name suggests, this potion will assist you in seeing better in the dark. Not only can you see clearly but also see further as well. You can craft this by using the Nether Wart and a Golden Carrot.
Potion of Strength

Once you consume this potion, you’ll have increased strength that will allow your melee attacks to deal more damage. This is especially useful if you want to fight multiple mobs around the map. To brew this, you must use the Nether Wart and Blaze Powder.
Conclusion
And that was our Minecraft brewing guide. Hopefully, you’ve learned a thing or two about Minecraft brewing and the different kinds of potions that can be made in the game.
Not got Minecraft yet? Buy it from Minecraft.net!
Looking for more Minecraft content? Check out our other guides: